
Indie Artist VËR And Her Secret To Recording Professional Vocals On A Budget
June 13th, 2020 - Written by VËR

VËR is a singer, songwriter & producer from Montreal, Canada. Having studied piano as of age 4, and the voice since the age of 12, VËR’s passion and experience comes through in her musical projects. To expand her musical ability and to allow for more independent and creative control, she moved to Toronto to study Audio Production at The Harris Institute. VËR currently teaches voice out of her home studio where she also collaborates with other artists, does voiceover work and produces her own music. Her first debut EP, Bloom, is expected to launch in the summer of 2020.
There’s something really gratifying about making a DIY record from the comfort of your own home. It inevitably becomes an authentic process on your own schedule (and in your PJs, if that’s your style!)
I’m going to share some tips on how I recorded the vocals for my debut 4-song EP “Bloom” from my tiny room on the 23rd floor of a downtown condo building.
Want to skip to the final result post-mixing/mastering? Listen here.
SETUP:
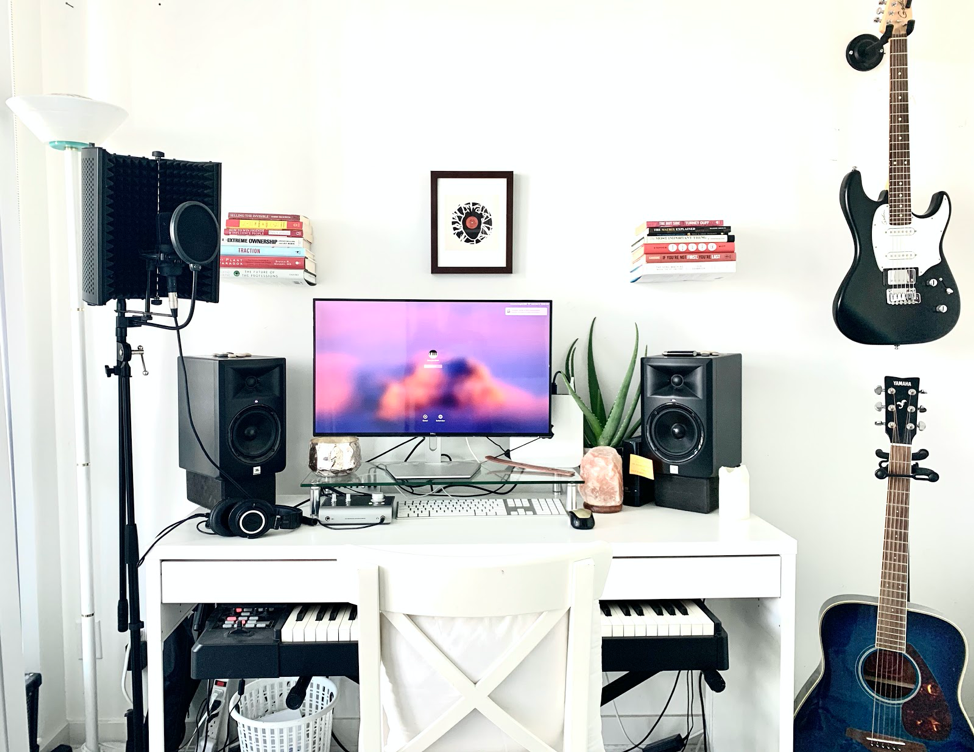
Today, you really don’t need much. My home studio is comprised of the following:
Mac mini
Logic Pro X
Audient id14 interface
2 x JBL Studio Monitors
Audio Technica 4040 Condenser Mic (find the best mic for you!)
Mic stand, pop filter and vocal reflection
Audio Technica headphones
Roland MIDI keyboard
If you plan on creating a lot of music at home, good quality goes a long way and it’s worth investing in equipment that you’ll be using frequently. If you’re on a tight budget, you can buy used equipment or rent from your local gear shop.
GETTING STARTED:
1. Set up your DAW (I use logic).
2. Create your tracks (I always start with one vocal track and one keyboard when creating a tune and then build the track from there, but that’s a personal preference based on how you create music!) For the purpose of this article, let’s assume your beat is already made and you’re recording to an audio file.
3. Test mic levels (you want the signal to sit close to the higher green/yellow -but definitely not the red) having an interface like the audient is great because if its built-in metering signals.
4. Make sure you’re getting signal out (so you can hear yourself and the instruments).
5. Set the tempo (BPM).

RECORD:
This is the most important part because quality in = quality out. If you record an okay take, no amount of editing can make it sound great. Go for your best take before committing. I chose to rent a great compressor (UA Solo 610) to enhance the quality of my recording. The cost was 20$/week.
Make sure you’re a good distance away from the mic (for low volume delivery get in close and back up for those high notes) and keep your ear out for any background noise, since your room is most likely not soundproof. (I should note that the room I recorded in was less than ideal - I’m talking a floor-to-ceiling window, a dog running around and thin walls. If you know the downfalls of your particular space though, you can still make it work!) The internet is a great tool that can help you acoustically treat your space.
Side note: Don’t forget to remove anything noisy that you may be wearing (i.e. jewelry!)
When it comes to recording, I like to go through the full song a couple of times first. I find that it helps make the record sound more organic and natural. For more challenging/elaborate parts of the song, it definitely helps to punch in at specific points instead of starting the song from scratch each time. Then I’ll go in and “dissect” each take.
COMPING/ORGANIZING:
I’m quite picky when it comes to recording vocals. I also record my own harmonies and doubles so the amount of tracks can get busy and overwhelming. This is where organization comes in handy. I use a color coding system and I name my tracks accordingly to help me navigate the DAW and not get too overwhelmed.

Blue: the natural color Logic automatically records
Fuscia: a good take I may want to include in the final comp
Green: the winning take
Red: re-record (if I like the melody/idea but not the actual take for example)
*Shortcut to open colors on logic: “option + C”
EDITING:
This is the most fun part of the process for me least for me because my music is very vocal-centric. I love getting creative with filters, reverb, layering, panning etc!
Now that the takes are all organized, I go through them all and compile the best parts into a new track called “LEAD VOX COMPD”
Then I record on top of the “compd” track and add in doubles, harmonies, and any extra adlibs to help bring the vision to life.
Pro tip: take a break every now and then. Giving your ears (and voice) a break is so important. Also, keep some tea or room temperature water handy. Warming your voice up before you start is always a good idea too! (Feel free to reach out for some great vocal warmup ideas. Contact info below)

PLUGINS:
Plugins are a great tool to get creative and to give your recordings the style and effects you’re going after. My favorite plugin is from Valhalla; I love getting creative with their reverb on my final vocals. When recording the initial demo takes, I usually just apply the built-in logic ‘Bright Vocal’ settings. I personally need to have some reverb when recording my initial demo vocals; creating my comfortable ‘sonic space’ at the onset is important for me to get into the zone and get my best performance.
To apply plugins to a specific track, select the track you’re working on > click in the Audio FX box (beneath the Input Button in the Inspector column (to the right of Library) > choose your plugin category > select the plugin. To customize your plugin settings, click on the Plugin in the Inspector section and a separate plugin window will open up. Tweak away!

Feel free to reach out to me on instagram (@thisisver) if you want to know more about the process, get some more tips/points, or just share what you’re working on! I love connecting with other artists.
Stream VËR’s new single Best for You (feat. Dante) now!


